Home Gym Flooring for Heavy Lifting: Protect Your Equipment (and Your Home)
Home Gym Flooring for Heavy Lifting: Protect Your Equipment (and Your Home)
You've invested thousands in your barbell, plates, and power rack. You're pulling serious weight and making genuine progress. But every time you complete a heavy deadlift or drop a clean from overhead, you wonder: "Is my floor going to hold up?"
The answer depends entirely on what's underneath those plates.
Inadequate flooring for heavy lifting leads to damaged equipment, cracked subfloors, noise complaints from family or neighbors, and constant worry that limits your training. The right flooring solution lets you train with confidence, protect your home's structure, and maximize your lifting potential without compromise.
This guide gives serious home lifters—powerlifters, Olympic weightlifters, and strength enthusiasts—everything you need to choose and install flooring that handles heavy loads safely and effectively.
Understanding Impact Forces: The Physics Made Simple
When you drop weight, the forces involved are dramatically higher than the static load sitting on the floor.
The Multiplication Effect
Static weight: A 150kg loaded barbell sitting on the floor exerts exactly 150kg of force.
Dropped weight: That same 150kg barbell dropped from hip height (approximately 1 meter) creates an instantaneous impact force of 2,000-2,500kg—over 15 times the static weight.
Overhead drops: From overhead position (2+ meters), impact forces can exceed 3,000kg for a split second.
This isn't exaggeration—it's basic physics. The energy from falling weight must be absorbed somewhere: either by your flooring and subfloor, or dissipated through proper shock-absorbing materials.
Why Your Subfloor is at Risk
Most residential subfloors are designed to support distributed loads (furniture, people walking) of 150-200kg per square meter. They're not engineered for concentrated impact loads thousands of kilograms hitting a small area in 0.02 seconds.
Wooden subfloors (common in UK homes):
- Joists spaced 400-600mm apart
- Floorboards or chipboard designed for static loads
- Vulnerable to point impacts and vibration
- Can crack, split, or develop permanent deflection from repeated heavy drops
Concrete subfloors:
- More resistant to structural damage from impacts
- Can crack from repeated point loads, especially if old or thin
- Still transmits enormous noise and vibration to surrounding spaces
- Causes equipment damage without proper protection
Equipment Damage from Hard Surfaces
Dropping barbells onto inadequate surfaces damages more than your floor:
Barbell damage: Sleeves can bend, shaft can permanently deform, bearings can fail from repeated hard impacts
Plate damage: Bumper plates develop flat spots, internal delamination, and cracking from concrete or thin flooring
Rack damage: Vibrations from nearby drops can loosen bolts, stress welds, and misalign safety catches
Your body: Hard surfaces create jarring impacts transmitted through your joints during every rep
Proper shock-absorbing flooring protects all these investments simultaneously.
Minimum Thickness Requirements: Don't Go Too Thin
Flooring thickness directly determines impact protection. Understanding minimum requirements prevents expensive mistakes.
For Powerlifting (Deadlifts, Squats, Bench Press)
Light powerlifting (up to 150kg total):
- Minimum: 15mm rubber tiles across training area
- Recommended: 20mm for peace of mind and longevity
- Suitable products: GFS Connect Tiles 15-20mm
Serious powerlifting (150-250kg):
- Minimum: 20mm high-density rubber
- Recommended: 22mm shock-absorbing tiles in deadlift zone
- Suitable products: Pavigym Extreme S&S 22mm
Heavy powerlifting (250kg+):
- Minimum: 22mm shock-absorbing system
- Recommended: 25mm+ or dual-layer platform construction
- Suitable products: Pavigym Endurance S&S 22mm with platform base
Critical consideration: Powerlifting typically involves controlled lowering rather than true drops. However, failed reps, max attempts, and occasional mishaps mean you need protection for worst-case scenarios, not just perfect technique.
For Olympic Lifting (Cleans, Snatches, Jerks)
Olympic lifting involves regular overhead drops, requiring more substantial protection:
Technique work and light training (up to 100kg):
- Minimum: 20mm rubber across entire lifting area
- Recommended: Dedicated platform with 22mm shock-absorbing base
- Allows safe dropping while protecting subfloor
Intermediate Olympic lifting (100-150kg):
- Minimum: 22mm shock-absorbing tiles or platform system
- Recommended: Purpose-built platform with rubber-wood-rubber construction
- Essential for repeated drops without floor damage
Advanced Olympic lifting (150kg+):
- Minimum: Professional platform with shock-absorbing base and wood surface
- Recommended: Competition-standard platform meeting IWF specifications
- Non-negotiable for safety and equipment protection
Olympic lifting demands are unique because drops from overhead height are the standard completion of successful lifts, not occasional failures.
The "Too Thin" Warning Signs
You've chosen inadequate thickness if you experience:
- Loud banging sounds during normal training
- Visible floor deflection or bounce when dropping weights
- Neighbors or family complaining about noise
- Concerns about dropping weight safely
- Equipment showing impact damage
- Subfloor cracks or damage appearing
If any of these apply, upgrade thickness immediately before structural damage worsens.
Platform Construction: DIY vs Pre-Made Solutions
Lifting platforms provide the gold standard for heavy lifting protection, combining wood stability with rubber shock absorption.
Why Platforms Excel for Heavy Lifting
Stable lifting surface: Wood provides firm, non-compressing surface for optimal force transfer during lifts
Impact absorption: Rubber layers underneath absorb drop forces before reaching subfloor
Defined training space: Clear boundaries for positioning equipment and organizing training area
Longevity: Properly constructed platforms outlast tiles alone in extreme-use scenarios
Resale value: Platforms add value to home gyms and transfer to new homes
Basic DIY Platform Construction
Standard 2.4m × 2.4m Platform:
Materials needed:
- Two 8' × 4' (2.4m × 1.2m) sheets of 18mm plywood for base layer
- One 8' × 4' sheet of 18mm plywood or hardwood for center lifting surface
- Two 8' × 4' rubber tiles or horse stall mats 20mm+ thickness for drop zones
- Wood screws (50mm length)
- Wood glue
- Optional: polyurethane finish for wood surface
Construction steps:
- Lay base layer: Position two plywood sheets side by side covering 2.4m × 2.4m area
- Add shock absorption: Place 20-22mm rubber flooring on outer sections (where plates will land)
- Create lifting surface: Position center plywood/hardwood sheet (1.2m width) between rubber sections
- Secure everything: Screw and glue all layers together ensuring no movement
- Finish: Sand wood surface smooth, apply polyurethane for durability
Total thickness: 38-40mm (18mm base + 20-22mm rubber)
Cost advantage: DIY platforms cost 40-60% less than pre-made options while providing excellent performance.
Advanced DIY: Multi-Layer Construction
For maximum protection (upper floors, 200kg+ lifting):
Layer 1 (bottom): Acoustic underlay 10-15mm for vibration dampening
Layer 2: 18mm plywood base for structure
Layer 3: 22-25mm shock-absorbing rubber tiles on drop zones
Layer 4: 18-20mm hardwood or plywood center lifting surface
Total thickness: 68-78mm of protection
This construction handles extreme loads while protecting wooden subfloors and minimizing noise transmission.
Pre-Made Platform Solutions
When to buy pre-made:
- Limited DIY skills or tools
- Time constraints for gym setup
- Desire for guaranteed quality and finish
- Need for competition-standard specifications
- Upper floor installation requiring engineered solution
What to look for:
- Minimum 20mm rubber sections for drop zones
- Solid wood lifting surface (not particleboard)
- Modular design for easy moving
- Clear assembly instructions
- Weight capacity rating exceeding your max lifts
Platform Positioning Considerations
For wooden subfloors: Position platform so joists run perpendicular to bar path, distributing weight across multiple joists
For upper floors: Place platform above load-bearing walls when possible
For basements: Any position works, but consider moisture and ventilation access
For garages: Position away from vehicle parking area if dual-use space
Virgin vs Recycled Rubber: Critical Difference for Heavy Use
Not all rubber flooring performs equally under serious training loads.
Virgin Rubber Advantages
Virgin rubber flooring uses new rubber materials without recycled content:
Higher density: Resists compression better under repeated heavy impacts
Consistent performance: Material properties uniform throughout, no weak spots
Superior durability: Lasts 2-3 times longer in heavy-use scenarios
Better shock absorption: Engineered compounds optimize energy dissipation
Reduced odor: Minimal rubber smell compared to recycled alternatives
Hygiene: Non-porous surface resists bacteria and moisture better
Examples: Pavigym Endurance, Pavigym Endurance S&S
Recycled Rubber Reality
Recycled rubber uses ground-up tires and industrial rubber waste:
Lower cost: Typically 30-50% cheaper than virgin rubber equivalents
Variable quality: Performance depends heavily on rubber source and processing
Faster compression: Shows permanent indentation sooner under heavy loads
Odor issues: Strong rubber smell that can persist for weeks
Adequate for moderate use: Works fine for lighter lifting and general training
Examples: Pavigym Extreme 7mm, many budget tiles
The Heavy Lifting Recommendation
For serious lifters (180kg+ deadlifts, regular Olympic lifting): Choose virgin rubber for primary lifting zones. The durability difference justifies cost over 5-10 years of intensive use.
For moderate lifters (under 180kg, controlled movements): Quality recycled rubber performs adequately. Consider GFS Connect Tiles for good value.
For budget-conscious builders: Use virgin rubber in immediate deadlift/drop zones (2m × 2m area), recycled rubber for surrounding space. This hybrid approach optimizes protection where it matters most.
Protecting Wooden Subfloors in Older Homes
UK homes often feature suspended wooden floors requiring special consideration.
Understanding Your Subfloor
Pre-1950s homes: Typically floorboards over joists, often with gaps and movement
1950s-1980s: Chipboard or plywood over joists, variable quality
Post-1980s: Engineered flooring systems, generally more robust
Assessment: Walk your proposed gym space noting any flex, creaking, or uneven areas. These indicate weaker subfloor requiring more protection.
Protection Strategies
Minimum protection (all wooden subfloors):
- 20mm rubber flooring minimum across entire training area
- Platform construction for dedicated lifting zones
- Equipment positioning over joists when possible
Enhanced protection (older or suspect subfloors):
- Acoustic underlay beneath rubber flooring
- Plywood base layer spreading load across larger area
- 22-25mm shock-absorbing tiles in lifting zones
- Weight limits observed (consult structural engineer if concerned)
Maximum protection (upper floors, heritage buildings):
- Multi-layer platform construction
- Professional structural assessment
- Potential joist reinforcement
- Load distribution calculations
- Noise vibration dampening throughout
Warning Signs of Subfloor Damage
Stop training immediately and assess if you notice:
- New cracks in ceiling below
- Increased floor flex or bounce
- Creaking where none existed before
- Visible floor damage or separation
- Complaints about noise or vibration from below
Early intervention prevents minor issues becoming major structural repairs.
Deadlift-Specific Considerations
Deadlifts create unique flooring demands requiring specific solutions.
The Deadlift Drop Problem
Unlike Olympic lifts where plates land flat, failed deadlifts often involve:
- One side dropping first (asymmetric impact)
- Bar rolling away from body (horizontal forces)
- Potential for weight to hit edge-on rather than flat
- Higher likelihood from max attempts when form breaks down
These scenarios create point loads and edge impacts that standard flooring handles poorly.
Deadlift Zone Setup
Minimum deadlift space: 2m × 2m centered on lifting position
Recommended space: 2.5m × 2.5m allowing safety margin
Flooring specification:
- 22mm shock-absorbing tiles minimum
- Extended protection 30-50cm beyond bar path for failed reps
- Seamless installation preventing edges catching plates
Platform advantages for deadlifts:
- Defined boundaries for bar positioning
- Stable, level surface for technique
- Maximum protection from worst-case drops
- Easy to position precisely over subfloor support
Managing Noise from Deadlifts
Deadlift noise comes from:
- Plates hitting floor on descent
- Bar knurling dragging across floor during reset
- Plates bouncing and settling
Noise reduction strategies:
- Controlled lowering to 50-70% of lift speed
- Touch-and-go reps when appropriate
- Thick rubber flooring with acoustic properties
- Deadlift platform with rubber drop zones
- Training during reasonable hours
Olympic Lifting Platform Specifications
Olympic lifting demands the gold standard in flooring protection.
IWF Competition Platform Standards
While home lifters don't need competition compliance, these specs provide proven guidelines:
Dimensions: 4m × 4m total area, 3m × 3m minimum
Construction: Wooden lifting surface (typically hardwood or plywood)
Drop zones: Rubber sections on both sides of center platform
Center width: 1.2-1.3m for lifting surface
Height: Raised 50-150mm above surrounding floor (optional for home use)
Simplified Home Platform for Olympic Lifting
Practical 2.4m × 2.4m home platform:
Center section: 1.2m width hardwood or quality plywood (18-20mm thick)
Drop zones: 22mm shock-absorbing rubber tiles on both sides (600mm width each)
Base layer: 18mm plywood across entire 2.4m × 2.4m area
Optional: Acoustic underlay beneath for upper floors
Total cost: Materials typically cost less than quality pre-made platforms while providing equivalent performance.
Surface Preparation and Finishing
Wood surface treatment:
- Sand smooth to prevent splinters
- Polyurethane coating for durability (2-3 coats)
- Non-slip additives optional but not essential
- Re-coat annually with heavy use
Rubber sections:
- Clean installation with degreaser
- Secure to base with appropriate adhesive
- Ensure perfect level with wood surface
- Inspect regularly for separation or wear
Training Area Beyond Platform
Olympic lifters need space beyond the platform:
Warm-up area: 15mm+ rubber flooring for technique work and mobility
Equipment storage: Flooring protecting subfloor from plate racks and barbell storage
Circulation: Safe pathways around platform for loading/unloading
Installation Tips for Heavy Lifting Scenarios
Proper installation maximizes flooring performance and longevity.
Subfloor Preparation
Critical first step: Clean, level, and dry subfloor
For wooden subfloors:
- Secure any loose boards or panels
- Fill gaps and holes with wood filler
- Ensure level surface (within 3mm variance across 2m)
- Address any moisture issues before installation
For concrete subfloors:
- Clean thoroughly removing dust and debris
- Check for moisture (tape plastic sheet overnight; condensation indicates moisture problem)
- Fill cracks and major imperfections
- Ensure level surface or self-level if needed
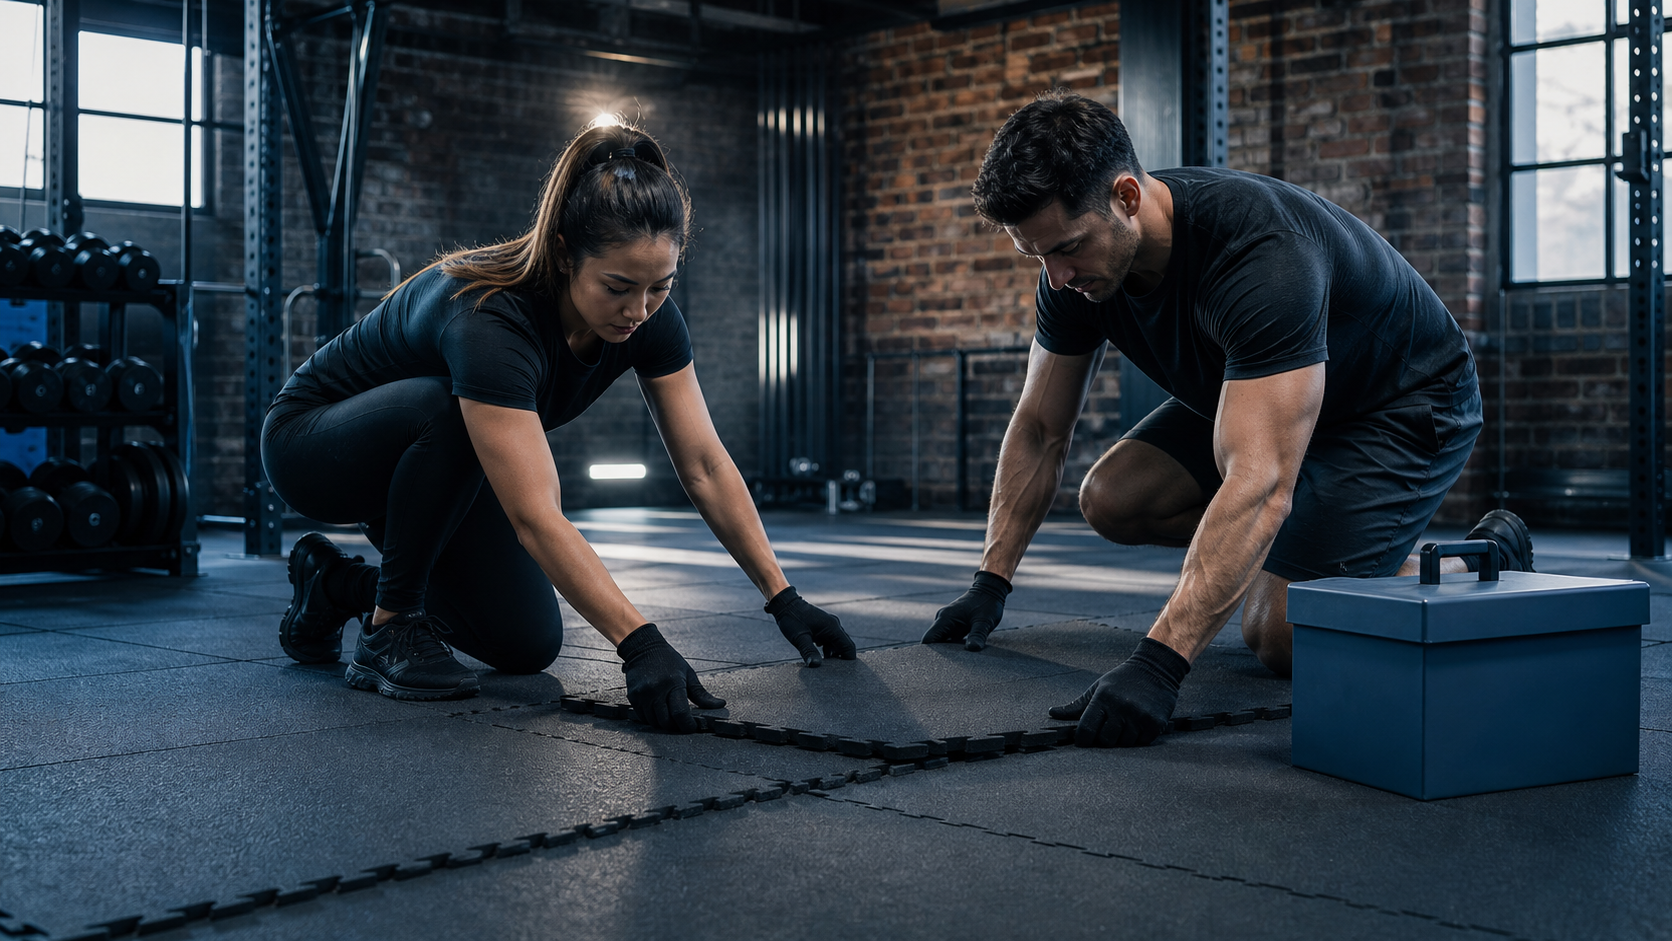
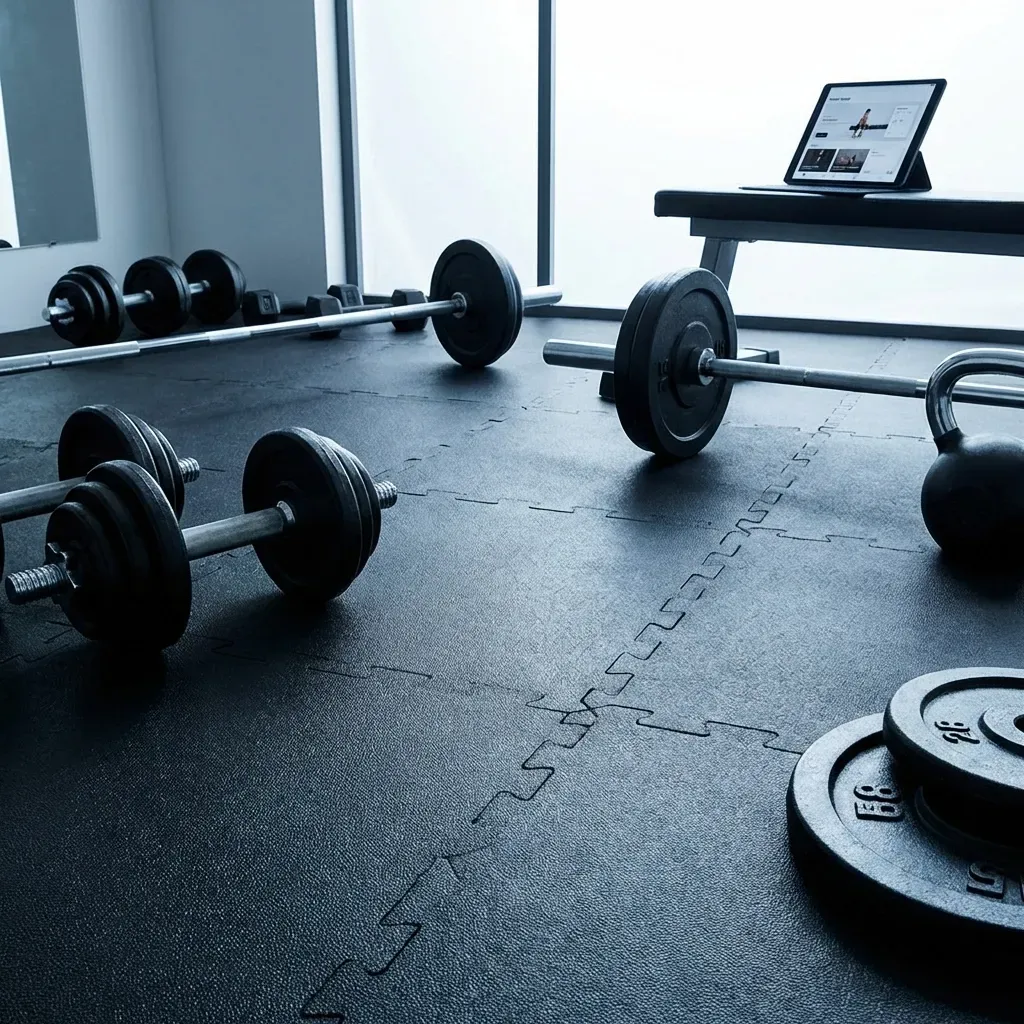
Interlocking Tile Installation
Best for: Modular home gym setups, renters, frequent equipment changes
Process:
- Start from corner of room
- Interlock tiles systematically row by row
- Use rubber mallet to ensure tight connections
- Cut edge tiles with utility knife and straight edge
- No adhesive required for permanent installations
Advantages: Removable, reusable, no professional installation needed
Considerations: May shift slightly under extreme loads; use edge strips to secure perimeter
Glue-Down Installation
Best for: Permanent home gyms, maximum stability, very heavy lifting
Process:
- Apply appropriate adhesive following manufacturer specifications
- Position flooring carefully (permanent installation)
- Roll or compress to ensure complete contact
- Allow proper curing time before use
- Professional installation recommended
Advantages: Zero movement, maximum stability, cleanest appearance
Considerations: Permanent commitment, professional removal if needed later
Platform-Specific Installation
Secure to subfloor (permanent): Screw through bottom plywood into subfloor joists
Floating installation (semi-permanent): Platform weight alone provides stability; removable if needed
Leveling: Use shims beneath platform corners if subfloor isn't perfectly level
Maintenance for Longevity
Heavy lifting is hard on flooring. Proper care maximizes lifespan.
Daily Maintenance
Quick sweep: Remove chalk dust and debris (2 minutes)
Spot clean: Wipe any sweat or spills immediately
Inspect: Visual check for any separation or damage
Weekly Deep Clean
Mop with mild detergent: 10-15 minutes for typical home gym
Clean platform wood: Damp cloth, avoid excess water
Check connections: Ensure tiles remain interlocked, platform sections secure
Monthly Inspection
Detailed visual check: Look for compression, wear patterns, damage
Connection testing: Verify all interlocking tiles fully connected
Platform integrity: Check screws, glue joints, rubber-wood contact
Quarterly Care
Deep clean and disinfect: Professional-grade cleaning
Wood surface treatment: Re-apply polyurethane on platform if needed
Replacement planning: Assess condition, plan for eventual replacement
Photo documentation: Track wear progression over time
Making Your Heavy Lifting Flooring Decision
For serious home lifters, flooring isn't optional—it's essential infrastructure.
Essential takeaways:
✓ Never go below 20mm thickness for heavy lifting (150kg+) ✓ Invest in shock-absorbing systems for Olympic lifting ✓ Build or buy platform for maximum protection and performance ✓ Choose virgin rubber for primary lifting zones ✓ Protect wooden subfloors with multi-layer approaches ✓ Install properly following manufacturer specifications
Ready to protect your equipment and your home?
Explore our heavy-duty flooring solutions, or contact our team for personalized recommendations based on your lifting style, weight loads, and home structure.
Lift heavy with confidence. Your floor can handle it.
Last updated: February 2026
The Gym Flooring Hub