
Rubber Tiles vs Rubber Rolls: Which is Best for Your Gym?
You've decided on rubber flooring for your gym—excellent choice. Now comes the question that stumps most gym builders: tiles or rolls?
Both options deliver the durability, shock absorption, and protection rubber flooring is known for. But they differ significantly in installation ease, appearance, cost structure, and long-term flexibility. The right choice depends on your specific space, skills, budget, and future plans.
This comprehensive comparison gives you everything you need to make the decision confidently, avoiding expensive mistakes and ensuring you choose the format that works best for your situation.
Quick Comparison Overview
| Factor | Rubber Tiles | Rubber Rolls |
|---|---|---|
| DIY Installation | Easy - perfect for first-timers | Moderate - requires 2+ people |
| Professional Look | Visible seams between tiles | Seamless or minimal seams |
| Expandability | Excellent - add tiles anytime | Difficult - requires new rolls |
| Replacement | Easy - swap individual tiles | Challenging - large sections only |
| Small Spaces | Ideal - minimal waste | Less efficient - more cutting |
| Large Open Areas | Good - many seams | Excellent - fewer seams |
| Upfront Cost | Moderate per m² | Similar per m², higher minimum order |
| Installation Cost | Low (DIY) to moderate | Moderate to high (often professional) |
| Delivery Handling | Easy - boxes manageable | Challenging - heavy, bulky rolls |
| Best For | Home gyms, flexibility, DIY | Commercial gyms, large spaces, seamless look |
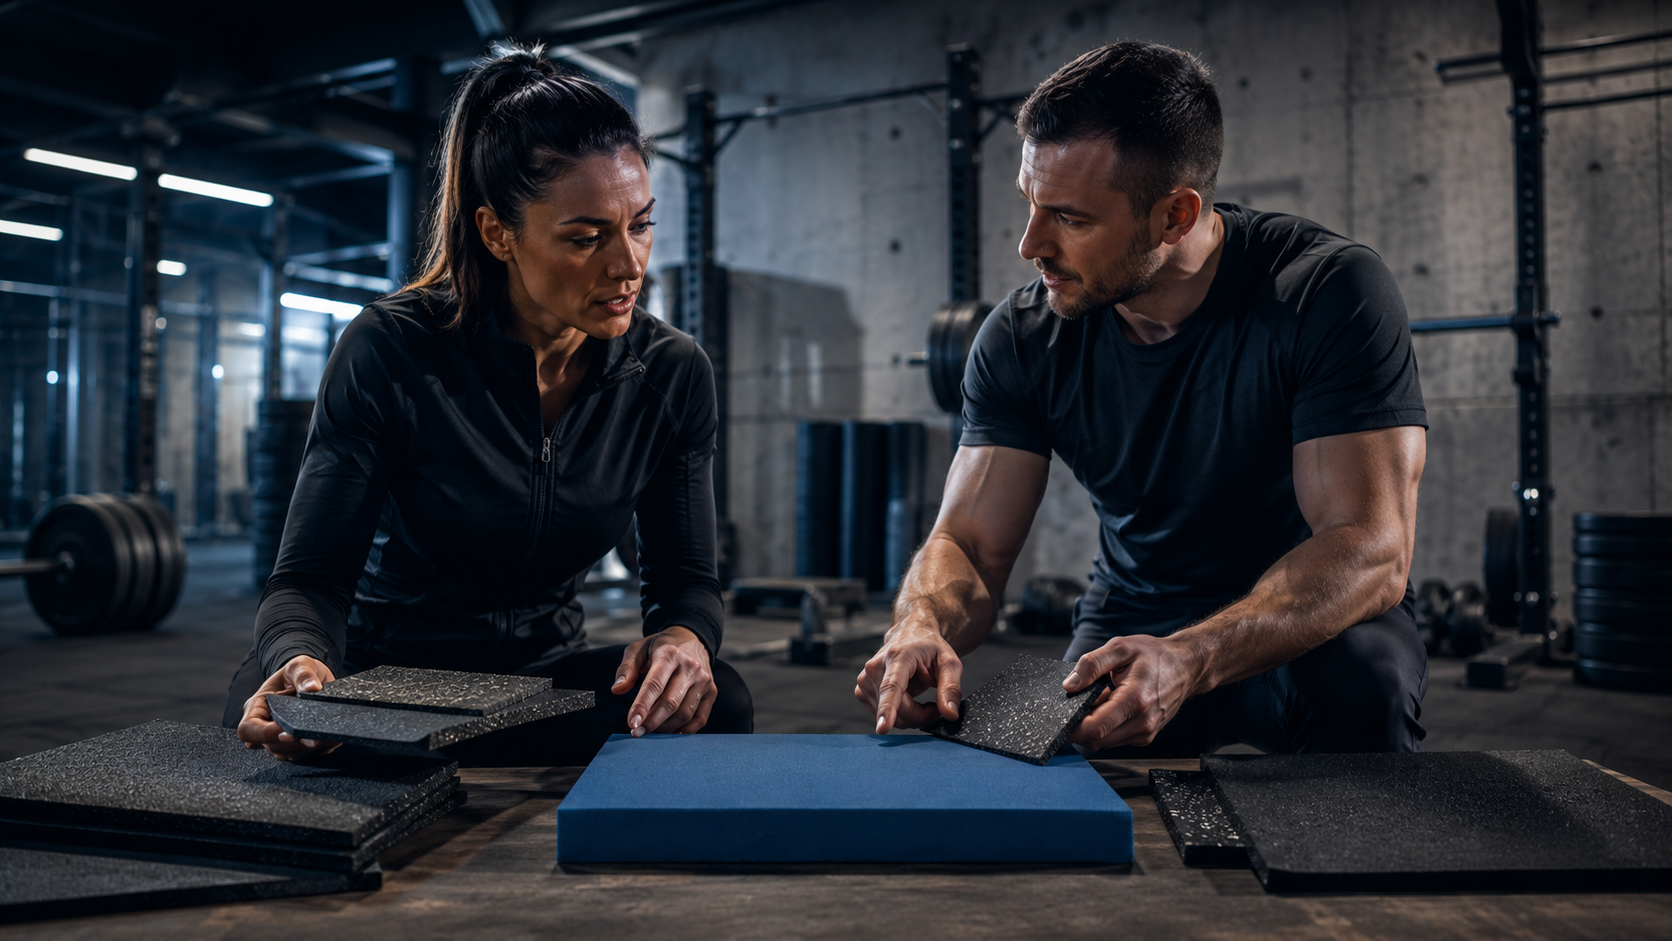
Rubber gym tiles are individual square sections, typically 500mm × 500mm or 1000mm × 1000mm, that connect together to cover your floor.
Interlocking vs Straight-Edge Tiles
Interlocking tiles feature puzzle-piece edges that connect without adhesive:
- Pavigym Extreme: Premium interlocking system
- GFS Connect Tiles: Reliable interlocking at accessible price
- Perfect for renters or those wanting removable flooring
- Slight movement possible under extreme use
Straight-edge tiles have square edges requiring glue or sitting loose:
- Cleaner appearance when glued
- More permanent installation
- Still individually replaceable
- Common in commercial installations
Tile Advantages
DIY-Friendly Installation: One person can easily handle and position tiles. No heavy lifting or wrestling with large sheets.
Flexible Ordering: Buy exactly the number of tiles you need. No minimum roll lengths forcing you to purchase excess.
Easy Expansion: Adding more gym space? Simply order additional tiles and connect them to your existing floor.
Simple Repairs: Damaged a section? Replace individual tiles without disturbing the entire floor.
Manageable Delivery: Tiles arrive in boxes you can move easily. No need for help unloading or special delivery arrangements.
Perfect for Odd Shapes: Irregular rooms, doorways, and obstacles are much easier to work around with individual tiles.
Tile Disadvantages
Visible Seams: Every tile connection creates a visible line. In large spaces, this creates a grid pattern some find less professional.
More Seams to Maintain: More connection points means more places for dirt accumulation and potential separation over time.
Slight Height Variations: Even quality tiles can have minor thickness variations creating subtle unevenness.
Time-Intensive for Large Areas: Installing 200+ individual tiles takes longer than rolling out several large sheets.
Understanding Rubber Rolls
Rubber gym rolls are continuous sheets of rubber flooring, typically 1.2m-2m wide and available in various lengths (commonly 5m, 10m, 15m, or custom).
Roll Specifications
Standard widths: 1.2m, 1.5m, or 2m wide Standard lengths: 5m to 20m+ rolls available Common thicknesses: 6mm, 8mm, 10mm, 15mm, 20mm Weight: Very heavy - 1.5m × 10m × 15mm roll weighs approximately 150-200kg
Roll Advantages
Seamless Appearance: Fewer seams create cleaner, more professional look, especially in open areas.
Faster Installation for Large Spaces: Once positioned, large areas are covered quickly compared to laying hundreds of tiles.
Smoother Surface: Fewer connection points mean more uniform surface across large areas.
Professional Aesthetic: Commercial facilities often prefer the seamless look for client-facing areas.
Better for Very Heavy Equipment: Large equipment like treadmills or multi-station machines sit more evenly without crossing multiple tile seams.
Roll Disadvantages
Heavy and Awkward: Requires 2-3 people to handle safely. Moving 150kg+ rolls through doorways and positioning them is physically demanding.
Challenging DIY Installation: Cutting to size, fitting around obstacles, and ensuring straight installation requires skill and appropriate tools.
Waste on Odd-Sized Rooms: Standard roll widths often leave waste when room dimensions don't match perfectly.
Difficult Expansion: Adding more space means ordering new rolls that may not match existing material perfectly (batch variations).
Complex Repairs: Damaged sections require replacing large pieces or cutting and seaming - not simple like swapping a tile.
Professional Installation Often Required: The difficulty of handling and installing rolls means many buyers need to budget for professional fitting.
Installation Comparison: DIY Reality Check
Installation difficulty significantly impacts your total cost and project timeline.
Installing Rubber Tiles (DIY-Friendly)
Skill Level Required: Beginner - no special skills needed
Tools Needed:
- Tape measure
- Utility knife or jigsaw for edge cuts
- Rubber mallet (for interlocking tiles)
- Straightedge for cutting guidance
- Chalk line for layout (optional)
Typical Installation Time (100m² space):
- One person: 8-12 hours
- Two people: 5-7 hours
- Includes: planning layout, cutting edge pieces, installing all tiles
Process:
- Clean and prepare subfloor
- Plan starting corner and layout pattern
- Begin laying tiles from corner
- Interlock or position tiles systematically
- Cut edge pieces to fit room dimensions
- Apply edge strips if desired
Common Challenges:
- Keeping rows straight (solved with chalk lines)
- Cutting precise edge pieces (patience required)
- Ensuring tight interlocking connections
Success Rate: Very high - most people successfully install tiles without professional help
Cost Impact: Zero to minimal installation costs if DIY
Installing Rubber Rolls (Moderate to Difficult)
Skill Level Required: Intermediate to advanced - or professional recommended
Tools Needed:
- Heavy-duty utility knife or vinyl cutter
- Straightedge (2m+ length)
- Roller (100kg+ weight) for flattening
- Adhesive application tools if gluing
- 2-3 strong helpers for positioning
- Measuring and marking tools
Typical Installation Time (100m² space):
- Professional team: 4-6 hours
- DIY with help: 10-15 hours
- Includes: rolling out, positioning, cutting, seaming, adhesive curing
Process:
- Clean and prepare subfloor meticulously
- Roll out material allowing 24 hours to relax and flatten
- Position rolls precisely (extremely heavy work)
- Cut to size and fit around obstacles
- Apply adhesive if permanent installation
- Roll entire surface for adhesion
- Seam edges between roll sections
Common Challenges:
- Physical difficulty of moving heavy rolls
- Achieving straight, precise cuts on thick rubber
- Aligning multiple rolls without gaps or overlaps
- Preventing bubbles or wrinkles during adhesive application
- Working in tight spaces with large, unwieldy material
Success Rate: Moderate for experienced DIYers, low for first-timers
Cost Impact: Professional installation often costs 30-50% of material cost
Installation Verdict
Choose tiles if: You're DIY-installing, working alone, want to avoid heavy lifting, or have limited experience with flooring projects.
Choose rolls if: You're hiring professionals, have experienced helpers available, prioritize seamless appearance, and have straightforward rectangular spaces.
Cost Analysis: Total Investment Comparison
Understanding total cost requires looking beyond material prices to installation and long-term factors.
Material Costs
Rubber Tiles:
- Entry-level: Budget-friendly options for basic protection
- Mid-range: GFS Connect Tiles balance quality and value
- Premium: Pavigym Endurance virgin rubber for maximum longevity
Rubber Rolls:
- Entry-level: Basic recycled rubber rolls
- Mid-range: Quality commercial-grade rolls
- Premium: Virgin rubber rolls for commercial facilities
Per square meter material costs are generally comparable between tiles and rolls of similar quality and thickness.
Installation Investment
Tiles DIY Installation:
- Cost: £0 (your time only)
- Time investment: Moderate
- Skill required: Minimal
Tiles Professional Installation:
- Cost: Lower than rolls (simpler process)
- Faster installation timeline
- Less common (most choose DIY)
Rolls DIY Installation:
- Cost: £0 but requires multiple helpers
- Time investment: Significant
- Skill required: Considerable
- Risk of mistakes higher
Rolls Professional Installation:
- Cost: Moderate to high professional fees
- Recommended for most roll installations
- Common in commercial projects
Hidden Cost Factors
Waste Factor:
- Tiles: Minimal waste - order exact quantity needed plus 5% for cuts
- Rolls: Higher waste if room dimensions don't match roll widths perfectly
Shipping Considerations:
- Tiles: Standard courier delivery, boxes manageable
- Rolls: May require pallet delivery, special handling fees possible
Tool Requirements:
- Tiles: Basic tools most people own
- Rolls: May need to rent heavy roller, special cutting tools
Future Modification Costs:
- Tiles: Additional tiles easy to source and add
- Rolls: New sections may not match (color/batch variations), more complex integration
Long-Term Value Comparison
Tiles:
- Easy repairs (swap damaged tiles)
- Expandable without replacing existing
- Relocatable to new spaces
- Individual tile replacement extends overall lifespan
Rolls:
- Repairs require larger section replacement
- Expansion challenging and visible
- Difficult to relocate
- Damage to one area may require replacing entire roll section
Total Cost Verdict
For most home gyms: Tiles offer better total value when installation savings and flexibility are considered.
For large commercial spaces: Rolls may provide better value when professional installation is planned regardless, and seamless appearance matters.
Aesthetics and Professional Appearance
Visual appeal matters, especially if you're sharing your gym on social media or running a commercial facility.
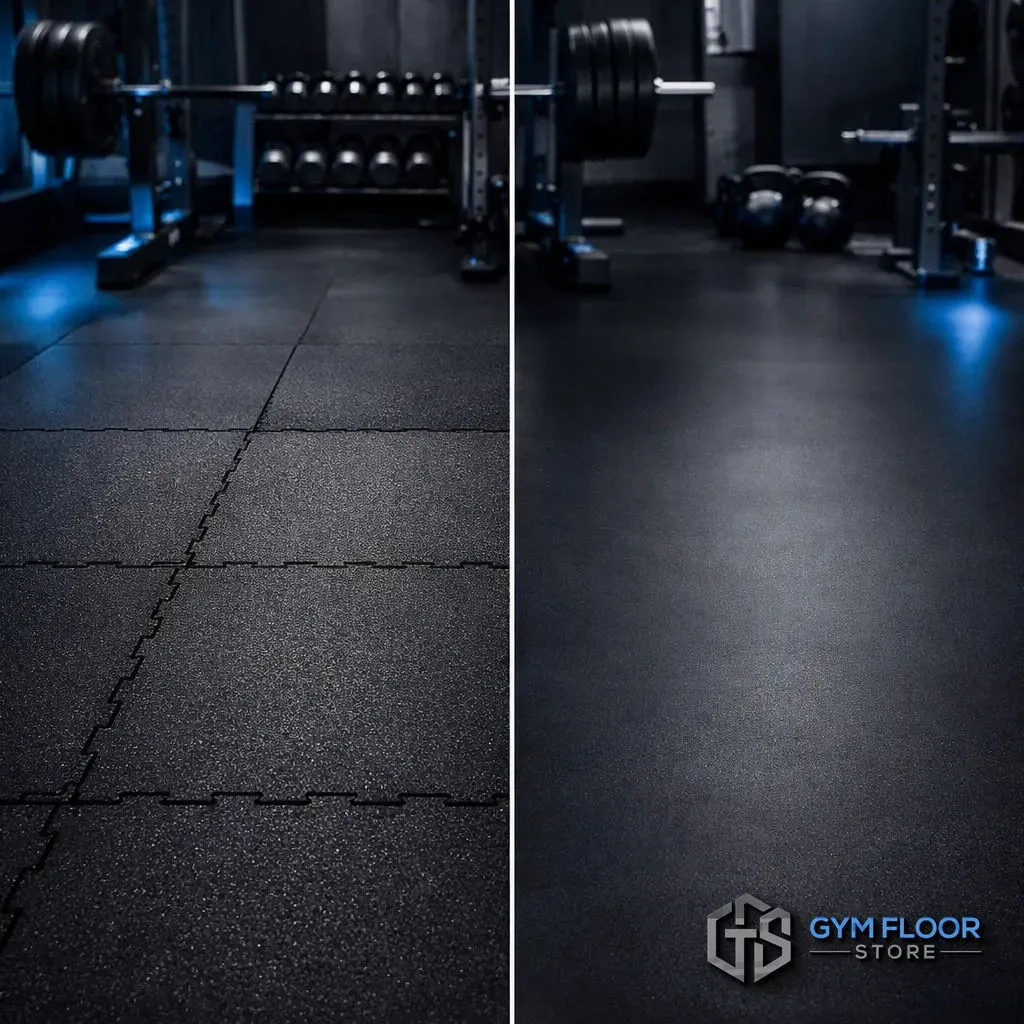
The Seam Question
Tiles Create Grid Patterns:
- Visible seam lines between every tile
- Can look busy in large open spaces
- Some find this defines training zones naturally
- Modern interlocking systems minimize seam visibility
- Less noticeable in darker colors
Rolls Offer Seamless Look:
- Minimal seam lines (only at roll edges)
- Cleaner appearance for professional facilities
- Better for photography and videography
- Premium aesthetic for client-facing spaces
Reality Check: In actual use, most people care less about seams than anticipated. Members focus on training, not flooring pattern. However, if Instagram-worthy aesthetics are a priority, rolls have the edge.
Color and Texture Consistency
Tiles: Slight variations between tiles possible, even from same batch. Mixing tiles from different boxes during installation minimizes any color differences.
Rolls: More consistent color throughout individual rolls, though different rolls may show batch variations.
Conclusion for Aesthetics
Choose tiles if: Seams don't bother you, or you prefer the defined grid look. Performance matters more than perfect aesthetics.
Choose rolls if: Seamless appearance is a priority for commercial presentation, photography, or premium positioning.
Expandability and Future Modifications
Your gym will likely evolve. Future-proofing your flooring choice matters.
Adding More Space Later
Tiles Excel at Expansion:
- Order additional tiles anytime
- Connect to existing installation seamlessly
- No need to disturb current floor
- Accommodate awkward additions (L-shapes, alcoves)
Example: Starting with home gym flooring in your garage, then expanding into an adjacent space? Simply order more tiles and connect them.
Rolls Challenge Expansion:
- New rolls may not match existing perfectly (color batching)
- Requires professional seaming of old and new sections
- Often looks like an addition rather than cohesive space
- May need to replace entire area for uniform appearance
Changing Room Layout
Tiles: Remove and reinstall easily when moving equipment or reconfiguring zones. Take them with you if you move house.
Rolls: Generally permanent. Reconfiguration means living with existing layout or starting over.
Upgrading Over Time
Tiles: Upgrade sections gradually. Replace high-wear areas with premium tiles while keeping others.
Rolls: All-or-nothing proposition. Partial upgrades look disjointed.
Expandability Verdict
Choose tiles if: You anticipate expanding, might move house, or want flexibility to modify your gym layout over time.
Choose rolls if: This is your final space configuration, you're committing to this location long-term, and you value consistency over flexibility.
Replacement and Repair Considerations
Damage happens. How you handle it differs dramatically between tiles and rolls.
When Tiles Get Damaged
Process:
- Identify damaged tile(s)
- Order exact replacement from supplier
- Remove damaged tile (disconnect interlocking edges)
- Install replacement tile
- Reconnect surrounding tiles
Time Required: 5-15 minutes per tile
Cost: Single tile replacement only
Difficulty: Very easy, anyone can do it
Result: Floor returns to like-new condition
Real Example: You drop a 140kg loaded barbell that damages one tile in your deadlift zone. Replace that single tile for minimal cost and effort rather than living with damage or replacing large sections.
When Rolls Get Damaged
Process:
- Assess damaged area
- Decide between living with damage or replacing
- If replacing: remove furniture, cut out damaged section
- Order new roll (possibly entire roll if seaming would be too visible)
- Professional cutting and seaming of new section
- Adhesive application and curing time
Time Required: Several hours to full day including curing
Cost: Large section or full roll replacement plus possible professional labor
Difficulty: Professional help often required
Result: Repair may be visible even when done well
Wear Pattern Management
Tiles: As high-traffic areas show wear (free weight zones, cardio equipment areas), replace affected tiles while leaving others. Extends overall floor lifespan significantly.
Rolls: Uneven wear across a roll creates aesthetic inconsistency. Often must replace larger sections than actually damaged to maintain appearance.
Repair Verdict
Choose tiles if: You want simple, economical repair options and ability to replace specific damaged sections easily.
Choose rolls if: You're confident damage won't occur, or you're prepared for larger-scale repairs/replacements.
Best Use Cases for Each Option
Different scenarios favor different formats.
Tiles are Ideal For:
Home Gyms: Perfect for garage, basement, or spare room conversions where DIY installation makes sense
Renters: Removable and relocatable to new properties
Small Spaces: Under 100m² where tile installation time is minimal
Irregular Room Shapes: L-shapes, alcoves, many doorways, built-in features
Phased Installations: Starting small then expanding as budget allows
First-Time Installers: No prior experience required
High-Wear Specific Zones: Free weight areas where replacements may be needed
Budget-Conscious Projects: Avoiding professional installation costs
Multi-Zone Training Spaces: Using different tile types/colors to define areas
Rolls are Ideal For:
Commercial Gyms: Large facilities where professional appearance matters and professional installation is already planned
Large Open Areas: Over 150m² where roll advantages in installation time become significant
Professional Studios: PT studios, yoga studios, where seamless aesthetics enhance brand
Simple Rectangular Spaces: Where roll widths align well with room dimensions
Permanent Installations: Facilities committed to current location and layout long-term
Heavy Equipment Areas: Cardio zones with treadmills, multi-station machines
When Professional Installation Planned: Cost difference between installing tiles vs rolls becomes minimal
Minimizing Seams Priority: Photography studios, filming locations, client-facing areas
Quick Decision Tool: Which Should You Choose?
Answer these questions to determine your best option:
Question 1: Who's Installing?
- DIY by yourself: Strong preference for tiles
- DIY with helpers: Either works, slight preference for tiles
- Hiring professionals: Either works equally well
Question 2: Space Size?
- Under 50m²: Tiles (minimal difference, easier handling)
- 50-150m²: Either works, depends on other factors
- Over 150m²: Rolls (if professional install), tiles (if DIY)
Question 3: Future Plans?
- Might expand gym space: Definitely tiles
- Might move house: Definitely tiles
- Permanent installation: Either works
- Certain this is final layout: Rolls acceptable
Question 4: Room Shape?
- Irregular, many corners/features: Definitely tiles
- Odd dimensions: Tiles likely better
- Simple rectangle: Either works well
- Large rectangular open area: Slight preference for rolls
Question 5: Budget for Installation?
- DIY only, no installation budget: Tiles
- Can hire professionals if needed: Either works
- Professional installation planned regardless: Either works
Question 6: Aesthetic Priority?
- Seams don't matter, performance is key: Tiles fine
- Prefer seamless but not critical: Either works
- Seamless appearance is essential: Rolls
Question 7: Damage Concerns?
- Heavy lifting, likely damage: Tiles (easier repairs)
- Moderate use, damage unlikely: Either works
- Light use, damage very unlikely: Either works
Product Recommendations
Top Tile Options
Premium Choice: Pavigym Endurance 7mm
- Virgin rubber construction
- Excellent durability
- Superior shock absorption
- Professional performance
Excellent Value: GFS Connect Tiles 15-20mm
- Reliable interlocking system
- Good balance of quality and investment
- Perfect for serious home gyms
Heavy-Duty Zones: Pavigym Extreme S&S 22mm
- Maximum impact protection
- Shock and sound absorbing
- Ideal for drop zones
Budget-Conscious: Pavigym Extreme 7mm
- Recycled rubber
- Good performance
- Accessible entry point
Top Roll Options
Commercial Quality: Virgin rubber commercial rolls
- Professional durability
- Seamless appearance
- Long lifespan
General Training: Quality recycled rubber rolls
- Good performance for mixed training
- Professional appearance
- Cost-effective for large areas
Making Your Final Decision
Both rubber tiles and rubber rolls provide excellent gym flooring. The "best" choice depends entirely on your specific situation.
Key Decision Factors:
✓ Tiles win for: DIY installation, expandability, repairs, flexibility, irregular spaces, home gyms
✓ Rolls win for: Seamless appearance, large simple spaces, professional studios, when professional installation is already planned
✓ Either works well for: Moderate-sized spaces, professional installations, long-term permanent gyms
Most Common Choice: For home gyms, rubber tiles are overwhelmingly popular due to DIY-friendly installation, flexibility, and easier expansion/repairs.
Commercial Preference: Rubber rolls are common in commercial facilities where professional installation is standard and seamless appearance matters.
Can't Decide?: Consider a hybrid approach—tiles for most areas with rolls in specific zones where seamless appearance matters most.
Ready to Choose Your Gym Flooring?
Now you understand the real differences between rubber tiles and rolls, you can make an informed decision that matches your space, skills, budget, and long-term plans.
Still have questions? Our team has helped thousands of gym builders navigate this exact decision. We'll ask about your specific situation and recommend the option that makes most sense for you—not just push our most expensive products.
Explore our complete rubber tile range | View rubber roll options
Or contact our team for personalized guidance based on your exact requirements.
Your perfect gym floor is waiting—in whichever format suits you best.
Last updated: February 2026
The Gym Flooring Hub