
The Complete Guide to Soundproofing Your Home Gym: Keep the Peace While You Train Hard
Discover proven methods to soundproof your UK home gym. Expert advice on flooring, walls, and equipment placement to eliminate noise complaints while training intensively.
You've invested in quality equipment, carved out dedicated training space, and committed to your fitness goals. Then reality hits: your downstairs neighbour complains about the noise, or your partner asks you to stop training when the kids are asleep.
Sound familiar? Noise is one of the biggest challenges facing home gym owners, particularly those in flats, upper floors, or terraced houses. The good news is that with the right approach, you can train intensively without disturbing others.
This comprehensive guide reveals exactly how to soundproof your home gym effectively, focusing on practical solutions that actually work for UK properties.
Why Home Gym Noise Matters More Than You Think
Before diving into solutions, let's understand why gym noise is such a significant issue and why it's worth addressing properly.
Neighbour Relations: In the UK's densely packed housing stock, sound transmission is a common source of disputes. The last thing you want is a strained relationship with neighbours or housemates over your training.
Training Freedom: When you're constantly worried about noise, you can't train at your best. You'll hold back on weight drops, avoid jumping exercises, and restrict your training times—undermining the whole point of having a home gym.
Property Considerations: For leaseholders and renters, excessive noise can breach tenancy agreements or lease covenants. Some buildings have specific restrictions on noise-generating activities during certain hours.
Structural Protection: The vibrations and impacts that create noise can also cause structural issues over time, from cracked ceilings in the room below to damaged joists and flooring.
Effective soundproofing isn't just about being considerate—it's about creating a space where you can train freely, intensively, and at any time without restriction.
Understanding the Three Types of Gym Noise
To soundproof effectively, you need to understand what types of noise you're dealing with. Home gyms generate three distinct types of sound:
1. Impact Noise
What It Is: The sound created when objects strike surfaces—dropped weights, footsteps during runs, plyometric jumps, or barbell slams.
Why It Matters: Impact noise travels through structural elements of buildings exceptionally well. It's the primary complaint from downstairs neighbours because it transmits directly through floors, walls, and ceilings.
Primary Sources:
- Dropped dumbbells or kettlebells
- Barbell drops during Olympic lifts
- Box jumps and plyometric work
- Heavy footsteps during cardio
- Slam balls and medicine ball work
2. Airborne Noise
What It Is: Sound that travels through the air—grunting during heavy lifts, music from speakers, or the mechanical noise from equipment.
Why It Matters: While less problematic than impact noise, airborne sound can still travel through walls and closed doors, disturbing others in your home or adjacent properties.
Primary Sources:
- Training music and workout videos
- Vocal exertion during lifts
- Treadmill motor noise
- Ventilation fans
- Weights clanging together on racks
3. Structural Vibration
What It Is: Low-frequency vibrations that resonate through building structures, often felt as much as heard.
Why It Matters: Structural vibrations can travel surprising distances through buildings. They're particularly problematic in older properties with wooden joists and floorboards.
Primary Sources:
- Very heavy weight drops (150kg+)
- Impact from sled pushing on hard surfaces
- Repetitive jumping (skipping, burpees)
- Some cardio equipment with inadequate damping
The most effective soundproofing strategies address all three types simultaneously.
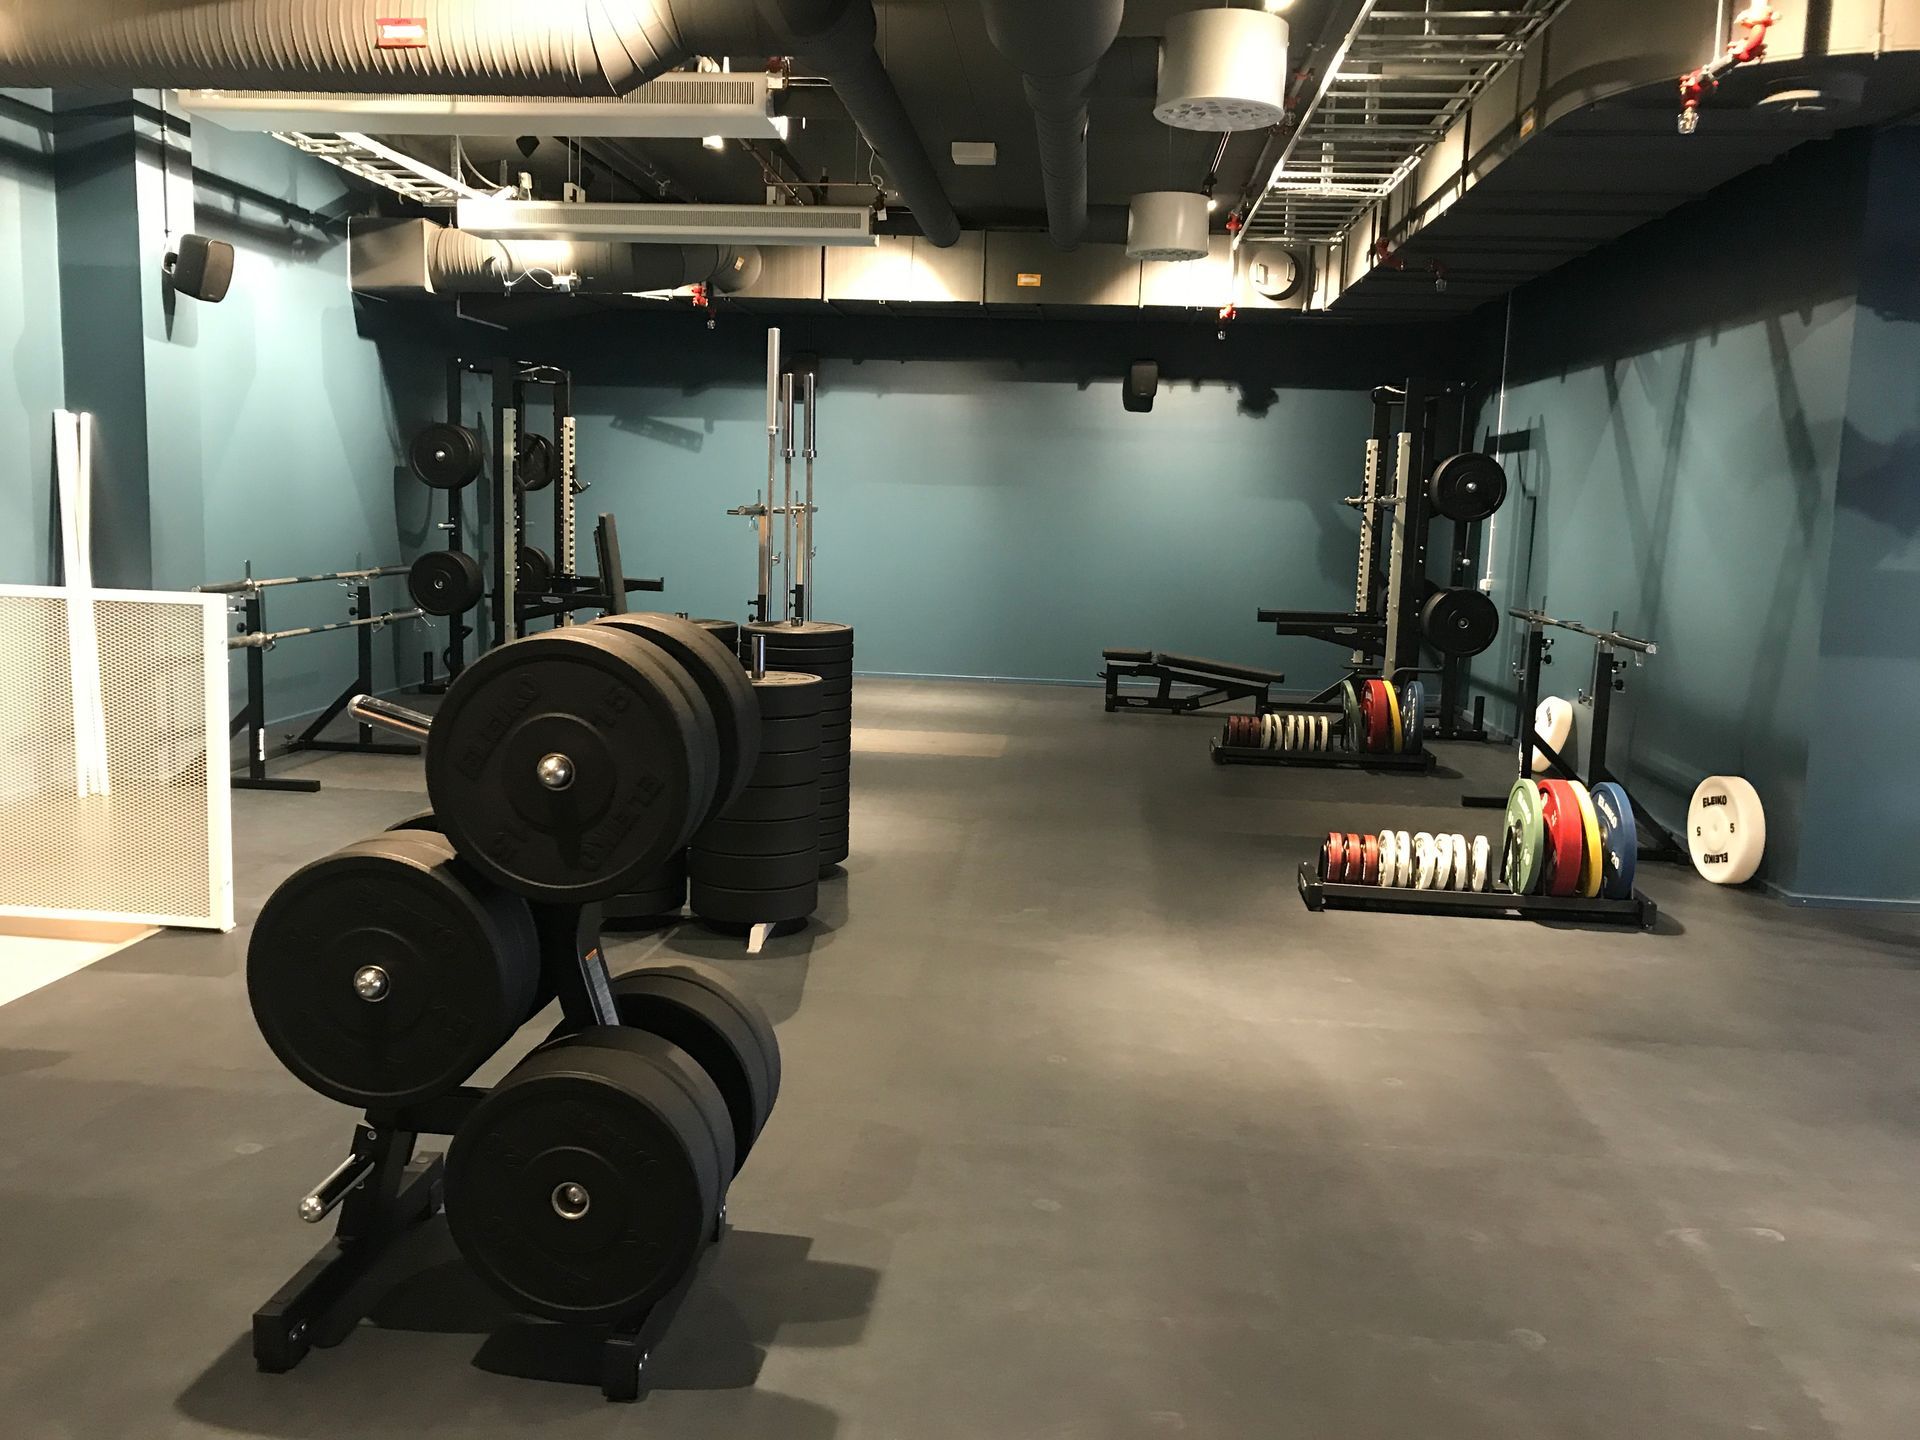
The Foundation: Choosing the Right Gym Flooring for Noise Reduction
Your floor is the single most important element in home gym soundproofing. Get this right, and you'll eliminate 70-80% of noise issues.
Why Standard Flooring Isn't Enough
Many home gym owners make the mistake of assuming any rubber mat will suffice. Standard gym mats, yoga mats, or thin rubber sheets provide minimal sound absorption. When weights hit them, the impact transmits straight through to the subfloor below.
The Science of Sound-Absorbing Flooring
Effective noise-reducing gym flooring works through three mechanisms:
Mass: Heavier, denser materials resist vibration transfer more effectively. This is why virgin rubber outperforms recycled alternatives—it's denser and more structurally sound.
Damping: Quality rubber converts kinetic energy from impacts into heat rather than transmitting it as sound. Specialized rubber compounds do this more effectively than basic materials.
Decoupling: Creating an air gap or using different material densities breaks the direct transmission path from impact point to subfloor.
Thickness Matters: How Much Do You Really Need?
Flooring thickness dramatically affects noise reduction, but the relationship isn't linear.
7-10mm: Suitable only for light cardio and bodyweight work. Provides minimal impact protection and negligible noise reduction. Not recommended for any weight training where you might drop loads.
15mm: The minimum for moderate weight training. Adequate for controlled weight work where you're always setting weights down carefully. Reduces impact noise by approximately 10-12 decibels.
20mm: The practical minimum for serious strength training. Handles most weightlifting scenarios effectively. Provides 15-17 decibel noise reduction, which represents a significant perceivable difference.
25mm+: Premium thickness for heavy lifting, Olympic movements, and upper-floor gyms. Offers maximum protection with 18-20+ decibel reduction. This is what serious home gym builders install when noise is a primary concern.
The Upper Floor Rule: If your home gym is on any floor above ground level, 20mm should be your minimum starting point. In many cases, 25mm is worth the investment.
Specialized Shock-Absorbing Flooring Systems
Beyond basic rubber tiles, specialized flooring systems offer superior noise control for demanding applications.
Shock & Sound Tiles: Products like the Pavigym Extreme S&S and Endurance S&S ranges are engineered specifically for noise and impact absorption. Their multi-layer construction includes acoustic dampening layers that outperform standard rubber.
These tiles typically feature:
- High-density virgin rubber top layer for durability
- Shock-absorbing middle layer for impact dampening
- Acoustic base layer that decouples from the subfloor
- Noise reduction ratings of 18-20 decibels or more
When to Choose Specialized Flooring:
- Upper floor home gyms in flats or maisonettes
- Heavy lifting scenarios (Olympic lifts, powerlifting)
- Properties with noise-sensitive neighbours
- Situations where training times overlap with others' sleep schedules
Adding Acoustic Underlays
For maximum noise control, combine quality surface flooring with purpose-built acoustic underlays.
What They Are: Dense foam or rubber layers installed between your subfloor and gym flooring. They add an extra dampening and decoupling layer.
Benefits:
- Additional 5-8 decibels of noise reduction
- Improved vibration dampening
- Extra cushioning for comfort
- Can help level uneven subfloors
Best Applications:
- Upper floor installations in multi-story buildings
- Older properties with timber subfloors
- Situations requiring maximum noise reduction
- Commercial gym installations
Installation Tip: Acoustic underlays work best when cut to size precisely and laid flat with no gaps or overlaps. Some products come with adhesive backing for secure positioning.
Complete Floor System Recommendations
Based on your situation, here are complete flooring systems that deliver results:
For Ground Floor, Detached House:
- 15mm rubber tiles (Pavigym Endurance or GFS Connect)
- No underlay required
- Cost-effective while fully protective
For Ground Floor, Semi-Detached or Terrace:
- 20mm rubber tiles (Pavigym Extreme or Endurance)
- Optional: acoustic underlay if sharing walls with neighbours
- Balances cost and performance
For First Floor or Above, House:
- 22mm shock-absorbing tiles (Pavigym Extreme S&S or Endurance S&S)
- 10mm acoustic underlay recommended
- Total thickness: 32mm for comprehensive protection
For Flats and Apartments:
- 22-25mm shock-absorbing tiles mandatory
- 10-15mm high-density acoustic underlay essential
- Consider additional wall dampening
- Total system thickness: 35-40mm
Beyond Flooring: Additional Soundproofing Strategies
While flooring handles the majority of noise issues, comprehensive soundproofing addresses all transmission paths.
Weight Drop Management
How you use your equipment matters as much as the flooring underneath it.
Controlled Lowering: Training yourself to control weight descent reduces impact dramatically. For most exercises, controlled eccentric phases are actually superior for strength development.
Drop Pads and Crash Mats: For Olympic lifting or CrossFit-style training where dropping is necessary, specialized crash pads provide extra protection. Place them in high-impact zones.
Bumper Plates: If you're doing Olympic lifts, invest in quality bumper plates. They're designed to be dropped and absorb impact better than standard metal plates.
Platform Systems: Consider building or purchasing a lifting platform for your heaviest lifts. The platform's construction (rubber-wood-rubber layers) provides superior impact and noise absorption.
Wall Treatment
Walls transmit both airborne and structural vibrations, particularly in adjoining properties.
Acoustic Panels: Installing acoustic foam or fabric-wrapped panels on walls absorbs airborne sound. Focus on walls shared with neighbours or other occupied rooms.
Mass-Loaded Vinyl: For serious installations, mass-loaded vinyl (MLV) is a dense, flexible sheeting that adds sound-blocking mass to walls without taking up much space.
Air Gaps: If undertaking major renovations, creating an air gap using resilient bars before adding additional plasterboard significantly improves sound isolation.
Strategic Placement: Position racks and equipment away from shared walls where possible. Even a 30-60cm gap reduces direct vibration transmission.
Equipment Selection and Placement
Your equipment choices affect noise levels significantly.
Cardio Equipment: Treadmills generate substantial noise and vibration. If possible, position them away from shared walls or above living spaces. Consider a dedicated treadmill mat under your main gym flooring for extra dampening.
Power Racks and Rigs: Place these on the thickest flooring areas. If doing pull-ups creates vibration, consider a freestanding rig rather than wall-mounted bars.
Plate Storage: Vertical plate storage keeps weights off the floor when not in use, reducing noise from grabbing and replacing plates.
Quiet Alternatives: Where appropriate, resistance bands, suspension trainers, or sand-filled implements provide effective training with virtually no noise.
Training Time Management
Sometimes the simplest solutions are behavioral rather than structural.
Peak Hours: If you live in a flat or terrace, avoid heavy training during traditional quiet hours (before 8am, after 9pm on weekdays, or early mornings on weekends).
Communication: Talk with neighbours. Let them know you've invested in soundproofing and ask if they notice disturbance at certain times. Most people are reasonable if you're making genuine efforts.
Noise-Friendly Sessions: Reserve heavy lifting for times when noise isn't an issue. Schedule bodyweight work, yoga, or stretching for early mornings or late evenings.
Temperature and Ventilation Solutions
Adequate ventilation is crucial for comfort but can undermine soundproofing if not handled properly.
Quiet Fans: Invest in silent or near-silent circulation fans rather than noisy box fans.
Windows: Opening windows for ventilation creates a direct sound transmission path. If possible, open windows facing away from neighbours or use them only when others aren't home.
HVAC Considerations: If your gym is in a basement or converted garage, proper climate control might require ducted solutions. Ensure any ductwork doesn't create direct sound transmission paths.
Measuring Your Soundproofing Success
How do you know if your efforts are working? Here are practical ways to assess your soundproofing:
The Neighbor Test: The most direct method is simply asking neighbours if they can hear your training. Most appreciate being asked and will give honest feedback.
Self-Test: Ask someone to perform typical gym movements while you listen from the rooms below, above, or adjacent. You'll quickly identify problem areas.
Decibel Meter Apps: Smartphone apps can measure sound levels (though they're not perfectly accurate). Take readings outside your gym space during training to quantify noise levels.
Video Recording: Record your training session on your phone, then play it back at normal volume to simulate what others might hear through walls or floors.
Vibration Test: Place a glass of water on surfaces in adjacent rooms. During heavy training, check if the water shows ripples indicating vibration transmission.
Cost-Effective Soundproofing on a Budget
Professional soundproofing can be expensive, but strategic improvements deliver results without breaking the bank.
Priority 1: Proper Flooring (£300-1000 for typical home gym) This is non-negotiable and delivers the most benefit per pound spent. Budget for 20mm minimum thickness tiles covering your training area completely.
Priority 2: Acoustic Underlay (£100-300) If you're on an upper floor or have noise-sensitive neighbors, underlay provides exceptional value for the additional noise reduction achieved.
Priority 3: Strategic Acoustic Panels (£50-200) Focus on shared walls. Even DIY solutions using acoustic foam or heavy curtains help with airborne sound.
Priority 4: Equipment Modifications (£50-150) Rubber bumper plates, dedicated crash mats for drop zones, and strategic equipment pads address specific noise sources.
DIY Soundproofing Tips:
- Heavy blankets or moving blankets on shared walls absorb sound temporarily while you assess effectiveness
- Weatherstripping around doors prevents sound leaking into hallways
- Bookcases against shared walls add mass and help block sound
- Carpet remnants or old rubber mats can be layered for extra thickness on a budget
Common Soundproofing Mistakes to Avoid
Learn from others' errors to avoid wasting money and effort:
Going Too Thin: The single most common mistake. That 7mm mat might seem adequate, but it won't handle serious training or provide meaningful noise reduction.
Ignoring the Subfloor: Installing expensive flooring over a damaged, uneven, or inappropriate subfloor undermines performance. Address subfloor issues first.
Partial Coverage: Some gym owners only floor the immediate area under their equipment. Impact noise travels through unprotected areas. Cover the entire training zone.
Forgetting About Gaps: Even small gaps between tiles or around room perimeters allow sound transmission. Ensure complete coverage without gaps.
Acoustic Foam Alone: Wall-mounted acoustic foam helps with echo and sound quality within your gym but does little to prevent sound transmission through walls. It's supplementary, not primary soundproofing.
Cheap Materials: Bargain-basement rubber often contains less dense materials that compress quickly and provide minimal dampening. You get what you pay for.
Case Study: Real-World Soundproofing Success
The Problem: Sarah converted her first-floor flat's spare bedroom into a home gym. After three weeks of training, her downstairs neighbours complained about noise during early-morning workouts before Sarah left for work.
The Solution:
- Installed 22mm Pavigym Extreme S&S tiles across the entire 12m² room (£550)
- Added 10mm acoustic underlay beneath the tiles (£120)
- Positioned her power rack away from the shared wall (£0)
- Created a 40mm platform for Olympic lifts using plywood and horse stall mats (£180)
- Shifted heavy training to evenings and bodyweight work to mornings (£0)
The Result: Noise complaints stopped completely. Sarah can now deadlift 120kg and do box jumps without disturbing neighbours. Her downstairs neighbour confirmed they notice "virtually nothing" even during heavy training sessions.
Total Investment: £850 plus one weekend of installation work—a small price for training freedom.
Professional Assessment: When to Call in Experts
Most home gym soundproofing is achievable as a DIY project, but certain situations benefit from professional input:
- Listed buildings with structural restrictions
- Serious acoustic issues requiring wall or ceiling modifications
- Complex multi-story buildings with challenging sound transmission paths
- High-budget commercial gym installations
- Situations where local authority building regulations apply
An acoustic consultant can perform proper sound transmission testing and recommend solutions tailored to your specific property.
Product Recommendations for Soundproofing Success
Based on extensive real-world testing in UK properties, here are top recommendations:
Best Overall Soundproofing Flooring
Pavigym Extreme S&S 22mm - Engineered specifically for shock and sound absorption with virgin rubber construction. Delivers exceptional noise reduction up to 20dB with five-year warranty.
Best Value for Money
GFS Connect Tile 20mm - Solid performance at a more accessible price point. Effective for most home gym applications where maximum noise reduction isn't critical.
Best for Upper Floor Gyms
Pavigym Endurance S&S 22mm + Acoustic Underlay - Combined system provides comprehensive protection. Premium solution for demanding installations.
Best Acoustic Underlay
Purpose-built acoustic underlays from reputable gym flooring suppliers outperform generic options. Look for 10-15mm thickness with density ratings over 180kg/m³.
Best DIY Budget Option
GFS 20mm Tiles + Heavy Duty Gym Mats - Layer standard GFS tiles with additional rubber gym mats in high-impact zones for enhanced protection at lower cost.
Your Soundproofing Action Plan
Ready to eliminate gym noise? Follow this step-by-step plan:
Week 1: Assessment
- Document current noise levels and identify problem areas
- Talk with neighbours about concerns and timing
- Measure your gym space accurately
- Assess subfloor condition
Week 2: Planning
- Determine your budget
- Choose flooring based on your situation (ground floor vs upper floor, semi-detached vs flat)
- Decide if acoustic underlay is necessary
- Order materials with appropriate delivery timing
Week 3: Preparation
- Clear your gym space completely
- Address any subfloor issues
- Gather installation tools
- Plan your flooring layout
Week 4: Installation
- Install underlay if using
- Lay gym flooring methodically
- Add any acoustic panels to shared walls
- Set up equipment on new surface
Week 5: Assessment & Adjustment
- Test noise levels with typical training
- Get feedback from neighbours
- Make any necessary adjustments
- Establish sustainable training schedules
Maintenance for Long-Term Performance
Proper maintenance ensures your soundproofing investment continues performing optimally:
Regular Cleaning: Sweep or vacuum weekly to prevent debris accumulation that can affect tile settling.
Inspection: Check quarterly for any tiles that have shifted, lifted, or show wear patterns. Address issues promptly.
Re-tightening: If using interlocking tiles, re-check connections every 3-6 months. Normal use can cause slight separation.
Equipment Padding: Inspect any equipment pads or mats monthly. Replace when compression becomes permanent.
The Bottom Line: Silence is Golden
Effective home gym soundproofing isn't about eliminating all noise—that's impossible and unnecessary. It's about reducing noise to levels that don't disturb others while allowing you to train intensively and freely.
The foundation of successful soundproofing is quality gym flooring in appropriate thickness for your situation. Everything else is supplementary. Get the floor right, and you've solved 70-80% of potential noise issues.
Don't compromise on this critical element. Inadequate flooring means constant worry about noise, restricted training times, strained relationships with neighbours, and potential property damage. None of those concerns are worth a few hundred pounds in savings.
Ready to Soundproof Your Home Gym?
At The Gym Floor Store, we've helped hundreds of home gym owners solve their soundproofing challenges. As the UK's approved Pavigym distributor with over 20 years of flooring expertise, we understand the specific challenges of UK properties—from Victorian terraces to modern apartments.
Our team can guide you to the right solution for your specific situation, ensuring you invest wisely in flooring that delivers lasting results.
Explore our complete range of shock-absorbing, noise-reducing gym flooring, or contact us for expert advice tailored to your property and training needs.
The Gym Flooring Hub